Tile design ideas to inspire you |
|
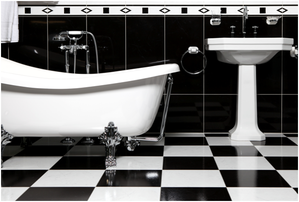 You wouldn’t want to look at an old and sloppy bathroom on a regular basis. Updating it can instantly add beauty and value to your home décor and installing new tiles is a significant part of it. The entire process is quite inexpensive and can be completed over the weekend. Take a look at the DIY procedures that will help revamp the way your bathroom looks: Measure the Floor
Use a measuring tape to obtain the dimensions of your bathroom. This will help you determine the number of tiles required along with mortar, grout and backing board that you will need for the work. Buying the right amount of tiles before initiating the process eliminates the risk of mismatch in terms of texture or colour between the production lots. Prepare Underlayment Attach an underlayment of cement board to the sub-floor. This will provide a smooth level of sturdy surface on which you can easily attach the tiles. Use a circular saw to cut the panels in the dimension for accurate fitting in the bathroom. Use a jigsaw to cut holes to accommodate all bathroom fixtures. Attach Underlayment Make use of a drill with a driver bit and attach the backerboard screws to the underlayment and the sub-floor. Remember to maintain an approximate distance of 6 inches between all the screws and be sure to keep them flat once secured. Determine Tile Layout If you are using a contrasting trim then lay the edge tile first and later lay all the tiles in such a configuration that it will require using of most whole tiles and fit well in the available space. Make proper use of the tile spacer to make sure that all the tiles are evenly spaced. Position the whole tiles such that they reduce the visibility of the tiles that are cut to fit a certain size. Cut And Place Tiles Use a tile saw to cut the tiles and place them in the layout. Check if all the tiles are spaced evenly and the layout looks aesthetically appealing. When you are satisfied with the arrangement, remove the tiles to apply thinset mortar. Apply Thin set Mortar Apply a thin layer of thinset mortar on the floor and ensure you do that in small sections using a notched trowel. Once done, put back the tiles in the decided pattern and leave the arrangement to dry for the next 24 hours. Apply Grout After 24 hours have passed, check if the mortar is dry. If it has properly dried then remove the spacer between the tiles, mix the grout and make use of a grout float to fill the spaces between the tiles. Wipe Out the Extra Grout This is the last step. Once you are done filling the grout, use a damp sponge and wipe out all the excess grout. Be sure not to leave any of it back on the tile and wipe the tile clean to avoid “grout haze” which gets difficult to remove. So, this is how you install the tiles all by yourself in your bathroom. You can check out a couple of DIY blogs online to get a better insight or consult an interior decorator. Consulting an expert will help if you aren’t sure about the new design of tiles that you would want to install in your bathroom. Also, before starting the work, make sure that you have understood the processes involved.
0 Comments
Leave a Reply. |
AuthorGrace Goodwin ArchivesCategories |
 RSS Feed
